Hello everyone and welcome to this tutorial which will guide you through setting up custom versions.
You can install the version of your choice on your Minecraft server even if it is not available in the Versions tab. The only prerequisite is having a working server-mode .jar file that will serve as your startup file.
You can of course change versions with this process on a server that already has existing data. For example to upgrade from Minecraft version 1.16.2 to version 1.16.3.
1 - Downloading the startup file
For this tutorial we will install Velocity in its latest version. Feel free to download whichever version you like.
You need to obtain a file with the .jar extension so that it can be used.
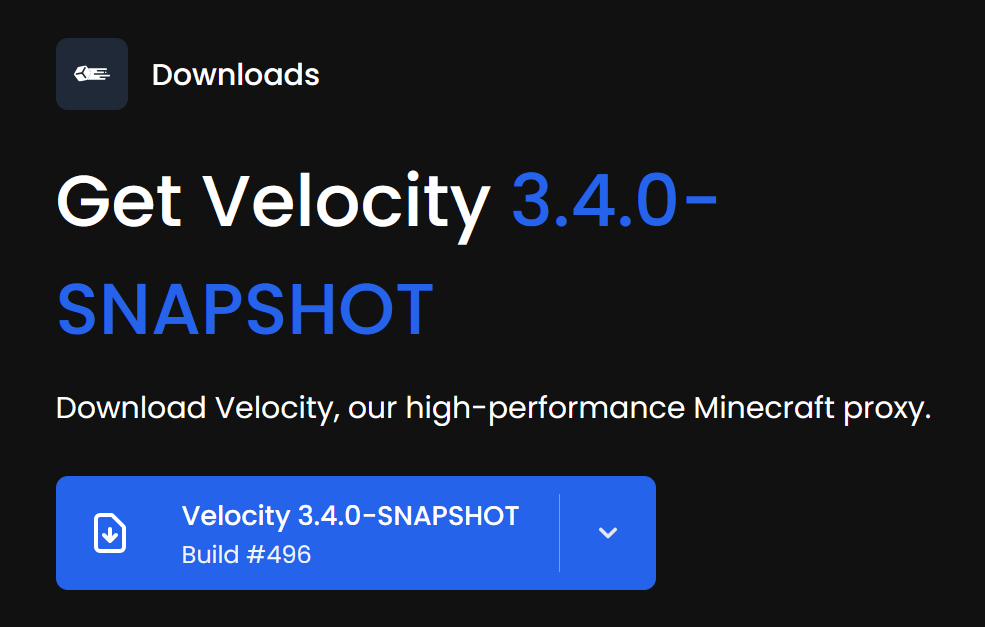
In my example I will download the latest version of Velocity from the official site: https://papermc.io/downloads/velocity
I click the download button and indeed obtain a file with the .jar extension in my case velocity-x.x.x-SNAPSHOT-xxx.jar
(The xs will be replaced by numbers for you.)
Make note of the downloaded file’s name as you will need it in step 3.
2 - Transferring the file to the server
The second step is to upload the downloaded file to your server. If you don’t know how to access your server’s files simply follow this tutorial to connect to your server via SFTP and access its files: https://forum.minestrator.com/threads/minestrator-manage-your-server-with-winscp-or-filezilla.1814/
You can also use your server’s WebSFTP available from the control panel.
Once the file is transferred make sure the server is fully stopped then proceed to step 3.
3 - Modifying the startup parameter
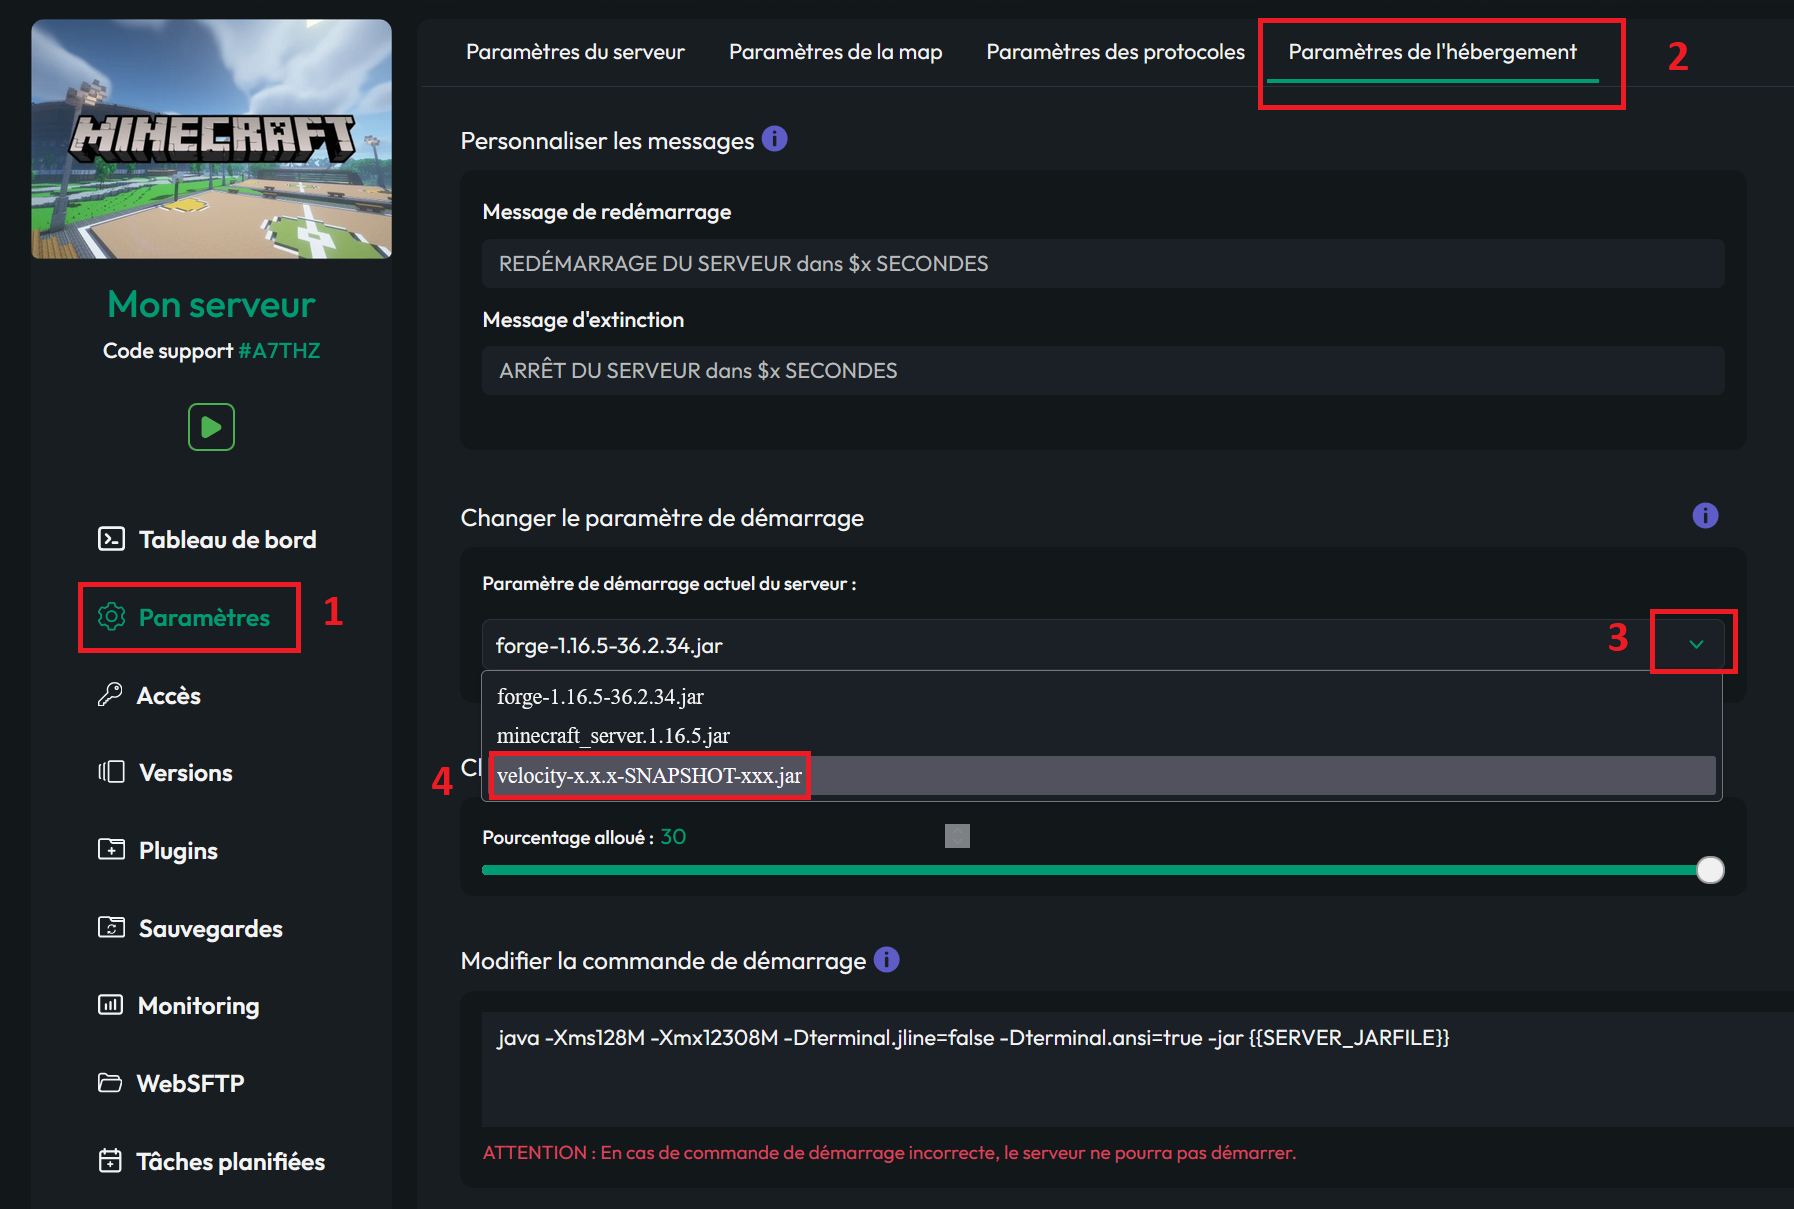
The final step is to change your server’s startup parameter. To do this on your Minecraft pod management page go to the Settings tab. Then click Hosting Settings in the top right. Next find the field labeled Change startup parameter.
You should see a dropdown listing all .jar files present on the server. Select the one matching the filename you downloaded in step 1 and confirm the change.
4 - Changing the Java version (Optional)
Depending on which Minecraft version you’re installing you may need to adjust your server’s Java version:

That’s it – just start your server and if it boots up successfully you have successfully set up your custom version.
You can also find this tutorial in video form at
Have fun!
You can install the version of your choice on your Minecraft server even if it is not available in the Versions tab. The only prerequisite is having a working server-mode .jar file that will serve as your startup file.
You can of course change versions with this process on a server that already has existing data. For example to upgrade from Minecraft version 1.16.2 to version 1.16.3.
1 - Downloading the startup file
For this tutorial we will install Velocity in its latest version. Feel free to download whichever version you like.
You need to obtain a file with the .jar extension so that it can be used.
In my example I will download the latest version of Velocity from the official site: https://papermc.io/downloads/velocity
I click the download button and indeed obtain a file with the .jar extension in my case velocity-x.x.x-SNAPSHOT-xxx.jar
(The xs will be replaced by numbers for you.)
Make note of the downloaded file’s name as you will need it in step 3.
2 - Transferring the file to the server
The second step is to upload the downloaded file to your server. If you don’t know how to access your server’s files simply follow this tutorial to connect to your server via SFTP and access its files: https://forum.minestrator.com/threads/minestrator-manage-your-server-with-winscp-or-filezilla.1814/
You can also use your server’s WebSFTP available from the control panel.
Once the file is transferred make sure the server is fully stopped then proceed to step 3.
3 - Modifying the startup parameter
The final step is to change your server’s startup parameter. To do this on your Minecraft pod management page go to the Settings tab. Then click Hosting Settings in the top right. Next find the field labeled Change startup parameter.
You should see a dropdown listing all .jar files present on the server. Select the one matching the filename you downloaded in step 1 and confirm the change.
4 - Changing the Java version (Optional)
Depending on which Minecraft version you’re installing you may need to adjust your server’s Java version:
- For versions 1.21 and above Java 21 is required.
- For versions 1.17 and above Java 17 is required.
- For versions 1.16 and below Java 8 is required.
That’s it – just start your server and if it boots up successfully you have successfully set up your custom version.
You can also find this tutorial in video form at
Have fun!