Hello !
In this tutorial we will see how to easily manage permissions using the LuckPerms tool.
LuckPerms is a permission management tool for Minecraft servers that allows administrators to precisely control what players can do on their server. It can be used as a plugin or a mod, available on most versions.
Why use permissions ?
Permissions are necessary for a large number of servers, whether you're playing survival with friends or hosting a server for many players. In both cases, we want to give access to certain commands for specific players.
For this, we will use LuckPerms. Here is a link to the official page of the tool: https://luckperms.net/download
Adding the tool to your server
To begin, we will add the tool to the server. In our case, we will download the plugin version (supported by Bukkit-based versions like Paper or Spigot).

We have a tutorial for plugin installation here: https://forum.minestrator.com/threads/minestrator-comment-mettre-des-plugins-sur-votre-serveur.366/
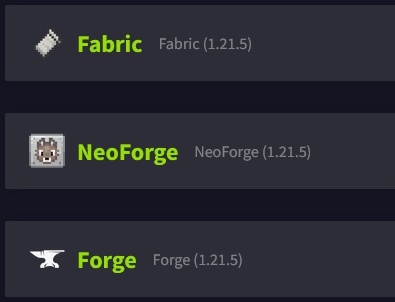
If you want to install the tool as a mod, choose the version that corresponds to your modloader (Forge, Neoforge, Fabric...).
Here is a tutorial for mod installation: https://forum.minestrator.com/threads/minestrator-comment-mettre-des-mods-sur-votre-serveur.370/
The tool works almost identically whether it's a plugin or a mod.
It is also possible to install it on a proxy like Velocity or BungeeCord, but the approach is slightly different and more complex, we will not cover that here.
Once the tool is added, you should see the line "[LuckPerms] Successfully enabled." in your logs. If so, congratulations, you now have LuckPerms. You can forget about operator commands, everything will now go through LuckPerms and the permissions it grants.
Adding permissions
Here we are at the heart of the subject. In our case, we have a Survival server with plugins that we simplify using EssentialX. I am the administrator but I don't want to give OP rank to everyone because I don't want them to cheat. However, I do want them to be able to use some EssentialX commands like /tpa and /sethome. I also want to give certain commands to my admin team so they can help moderate the players.
Before we begin, there are a few things to know.
Groups
Permissions are managed using groups. All players who are part of a group will have that group's permissions. By default, LuckPerms creates a "default" group for permissions given to each player.
Inheritance
You can make your groups inherit permissions from other groups, this prevents having to repeat the same permissions for several different groups.
LP editor
The advantage of LuckPerms is having an online editor. To access it, enter the command /lp editor in your console or chat. The plugin will give you a link. Open it in a browser. The page will then ask for a code to be entered. This code is given by the console. You will then find yourself on this page :
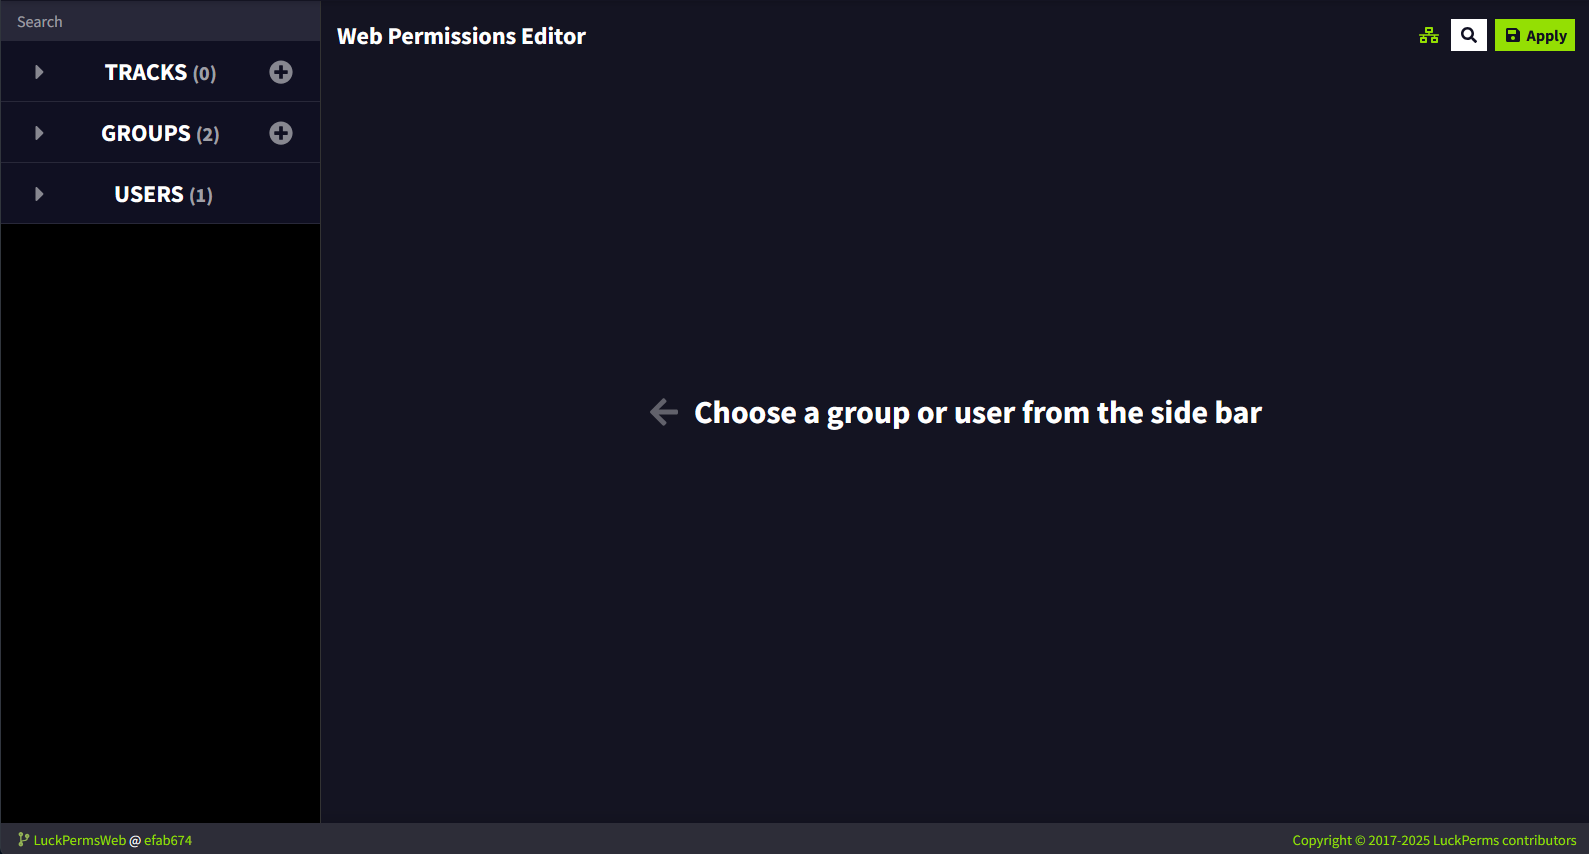
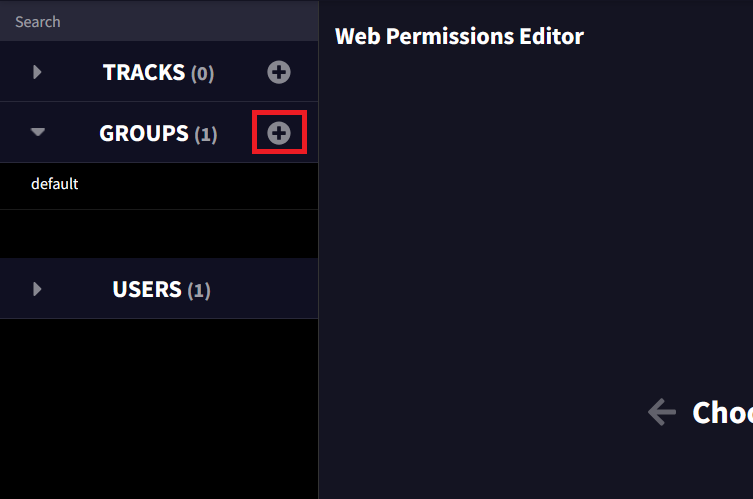
This is the LuckPerms permissions editor. We will start by creating a new group. To do this, click the "+" in "Groups". A window will open :
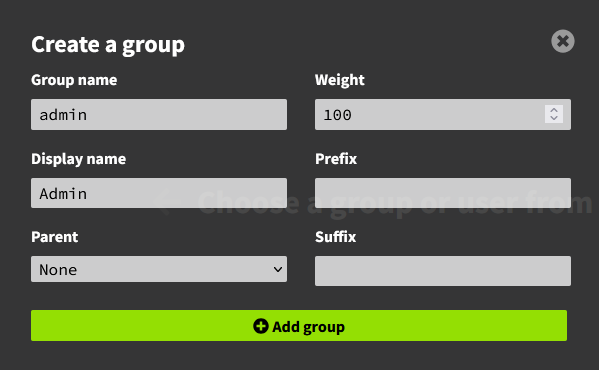
In our case, we will create an "Administrator" group, it will allow players with this role to have all the permissions on the server.
"Group name" will be the name of the group in other permissions. "Display name" will be the written name. "Parent" is the group from which it will inherit permissions. "Weight" is the role's priority compared to others (in case a player is in multiple groups). Then click on "+ Add group".
The "Administrator" group has been created. Select it, we will now give it all permissions. To do this, click on "Administrator" in "Groups" then at the bottom of the page in "Add permissions", simply enter an asterisk (*), like this :
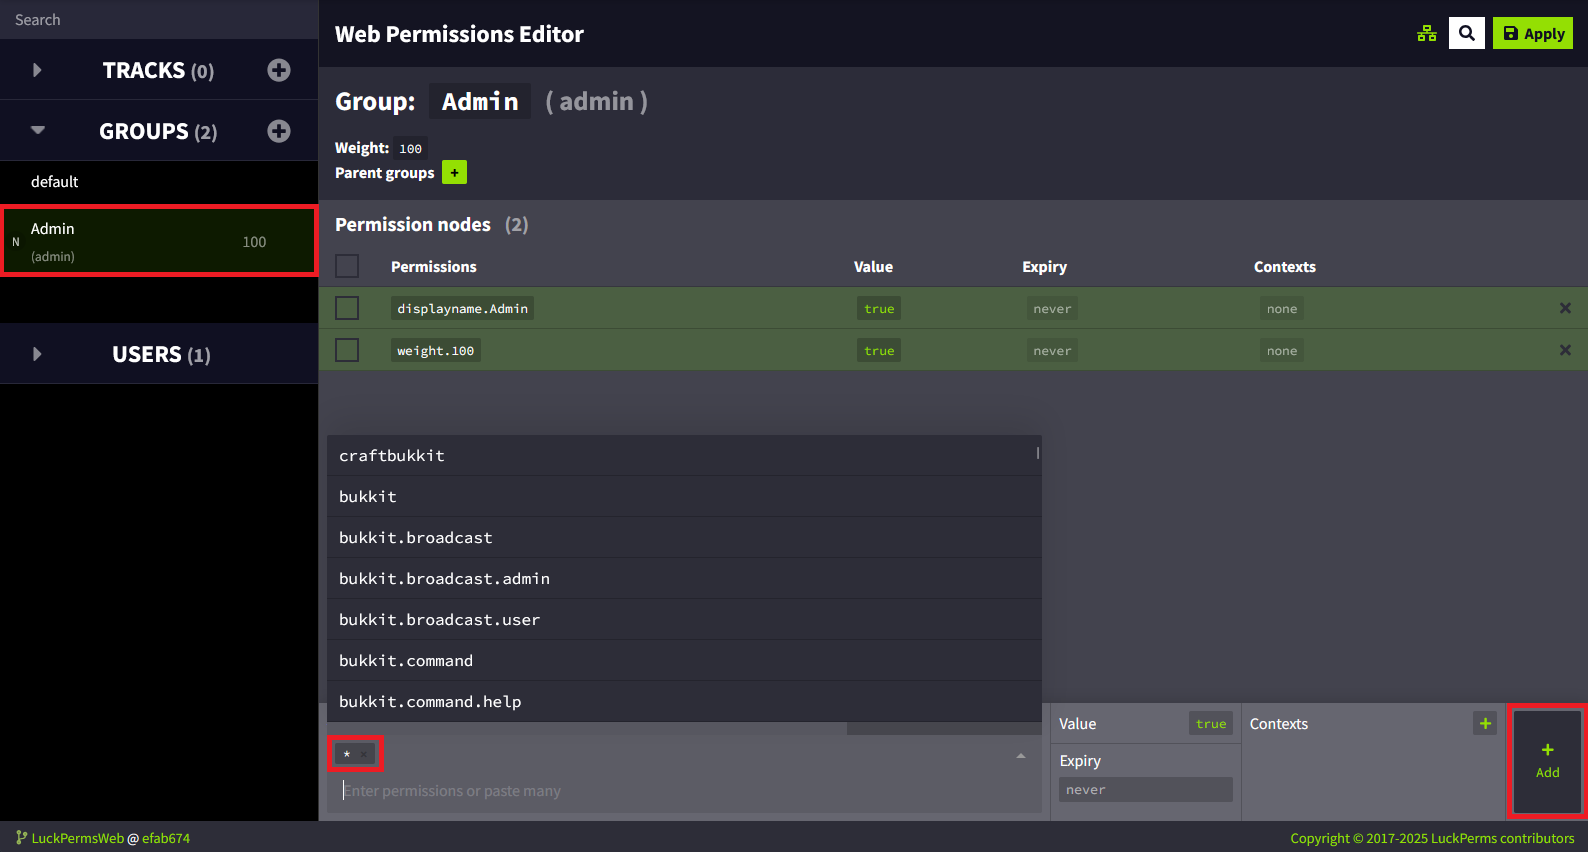
Then click "Add" at the bottom right.
The asterisk is called a "wildcard". This means it represents all permissions on the server. A permission like essentials.* therefore represents all permissions from that plugin. Simply using * thus represents all permissions from each plugin, as well as from Minecraft, Paper/Spigot, etc.
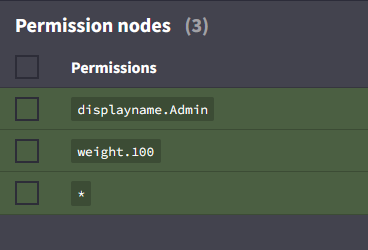
You should see the permission added in the list, like this :
Now that the permission is added, click on "Apply" at the top left. Once this is done, the green lines should turn gray. That means the save has been completed.
You should also see these lines in your server console :
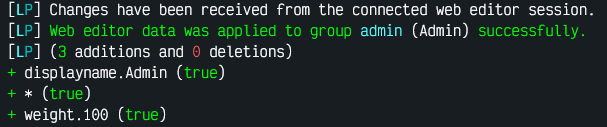
And there you go, you have created your first group and added your first permission.
Adding the group to a player
Now, you will give yourself the Administrator rank. You must have connected to the server at least once.
To do this enter in the console: /lp user <YourUsername> group add <YourGroup>
In our case, <YourGroup> will be "admin". And <YourUsername> will be... your username. Note that the player must have previously connected to the server.
You should see these lines in the console :

If so, everything is good.
Player permissions
Now, we want to do what will be useful for players. We will give them the permissions mentioned at the beginning of the guide, namely the TP commands and commands related to homes.
To do this, create a new group. Call it "players". Use the /lp editor to do all this.
Once the group is created, select it.
We want to add the permissions "essentials.sethome" and "essentials.home". Enter them in the same place where you previously entered the "*". Once that is done, click on "Add".
Users in this group will now have access to the /sethome and /home commands from essentialsX.
Now let's add the TP-related commands. As a reminder, you can find all permissions related to commands right here: https://essinfo.xeya.me/permissions.html
Add "essentials.tp.other", "essentials.tpa", "essentials.tpaccept" and "essentials.tpacancel". This will give them permission to teleport to another player by requesting validation.
Confirm everything, save the changes, then add the relevant users to the "players" group.
Congratulations! You now know how permissions work.
If you need help or advice, feel free to join our Discord, our team will be happy to help.
Have a nice day!
In this tutorial we will see how to easily manage permissions using the LuckPerms tool.
LuckPerms is a permission management tool for Minecraft servers that allows administrators to precisely control what players can do on their server. It can be used as a plugin or a mod, available on most versions.
Why use permissions ?
Permissions are necessary for a large number of servers, whether you're playing survival with friends or hosting a server for many players. In both cases, we want to give access to certain commands for specific players.
For this, we will use LuckPerms. Here is a link to the official page of the tool: https://luckperms.net/download
Adding the tool to your server
To begin, we will add the tool to the server. In our case, we will download the plugin version (supported by Bukkit-based versions like Paper or Spigot).
We have a tutorial for plugin installation here: https://forum.minestrator.com/threads/minestrator-comment-mettre-des-plugins-sur-votre-serveur.366/
If you want to install the tool as a mod, choose the version that corresponds to your modloader (Forge, Neoforge, Fabric...).
Here is a tutorial for mod installation: https://forum.minestrator.com/threads/minestrator-comment-mettre-des-mods-sur-votre-serveur.370/
The tool works almost identically whether it's a plugin or a mod.
It is also possible to install it on a proxy like Velocity or BungeeCord, but the approach is slightly different and more complex, we will not cover that here.
Once the tool is added, you should see the line "[LuckPerms] Successfully enabled." in your logs. If so, congratulations, you now have LuckPerms. You can forget about operator commands, everything will now go through LuckPerms and the permissions it grants.
Adding permissions
Here we are at the heart of the subject. In our case, we have a Survival server with plugins that we simplify using EssentialX. I am the administrator but I don't want to give OP rank to everyone because I don't want them to cheat. However, I do want them to be able to use some EssentialX commands like /tpa and /sethome. I also want to give certain commands to my admin team so they can help moderate the players.
Before we begin, there are a few things to know.
Groups
Permissions are managed using groups. All players who are part of a group will have that group's permissions. By default, LuckPerms creates a "default" group for permissions given to each player.
Inheritance
You can make your groups inherit permissions from other groups, this prevents having to repeat the same permissions for several different groups.
LP editor
The advantage of LuckPerms is having an online editor. To access it, enter the command /lp editor in your console or chat. The plugin will give you a link. Open it in a browser. The page will then ask for a code to be entered. This code is given by the console. You will then find yourself on this page :
This is the LuckPerms permissions editor. We will start by creating a new group. To do this, click the "+" in "Groups". A window will open :
In our case, we will create an "Administrator" group, it will allow players with this role to have all the permissions on the server.
"Group name" will be the name of the group in other permissions. "Display name" will be the written name. "Parent" is the group from which it will inherit permissions. "Weight" is the role's priority compared to others (in case a player is in multiple groups). Then click on "+ Add group".
The "Administrator" group has been created. Select it, we will now give it all permissions. To do this, click on "Administrator" in "Groups" then at the bottom of the page in "Add permissions", simply enter an asterisk (*), like this :
Then click "Add" at the bottom right.
The asterisk is called a "wildcard". This means it represents all permissions on the server. A permission like essentials.* therefore represents all permissions from that plugin. Simply using * thus represents all permissions from each plugin, as well as from Minecraft, Paper/Spigot, etc.
You should see the permission added in the list, like this :
Now that the permission is added, click on "Apply" at the top left. Once this is done, the green lines should turn gray. That means the save has been completed.
You should also see these lines in your server console :
And there you go, you have created your first group and added your first permission.
Adding the group to a player
Now, you will give yourself the Administrator rank. You must have connected to the server at least once.
To do this enter in the console: /lp user <YourUsername> group add <YourGroup>
In our case, <YourGroup> will be "admin". And <YourUsername> will be... your username. Note that the player must have previously connected to the server.
You should see these lines in the console :
If so, everything is good.
Player permissions
Now, we want to do what will be useful for players. We will give them the permissions mentioned at the beginning of the guide, namely the TP commands and commands related to homes.
To do this, create a new group. Call it "players". Use the /lp editor to do all this.
Once the group is created, select it.
We want to add the permissions "essentials.sethome" and "essentials.home". Enter them in the same place where you previously entered the "*". Once that is done, click on "Add".
Users in this group will now have access to the /sethome and /home commands from essentialsX.
Now let's add the TP-related commands. As a reminder, you can find all permissions related to commands right here: https://essinfo.xeya.me/permissions.html
Add "essentials.tp.other", "essentials.tpa", "essentials.tpaccept" and "essentials.tpacancel". This will give them permission to teleport to another player by requesting validation.
Confirm everything, save the changes, then add the relevant users to the "players" group.
Congratulations! You now know how permissions work.
If you need help or advice, feel free to join our Discord, our team will be happy to help.
Have a nice day!